Now, why have I dedicated a section of this review to turnbuckles? Well, because I want to give you guys some tips! Especially if it’s your first ever RC (something the AT1S is definitely aimed at). Raid your homes, and grab yourself some vaseline or chapsticks. Dab a little onto the turnbuckles themselves, and you’ll have a far easier time for screwing the things in!
There are two tools located in the various packages inside the gorgeous AT1S box that are designed for helping you with this. They even have the sizes you need to build the turnbuckles too on them! How useful is that!? For me, that really sells the kit well to any new RC Racers out there. The tools are there, they are included, you just have to use them.
As ever, I’ve built this kit up with the box stock standard steel turnbuckles and the black ball ends. If you want slightly tighter ballends, you can use the grey plastic ones that are an optional upgrade. I don’t recommend the Alloy turnbuckles, unless you’re purely racing outside. As the impacts from indoor racing will bend and weaken them very quickly. I have some, but I won’t fit them until I head outside next year.
Shocks
I do have to admit, I skipped a fair few pages ahead in the manual for building the shocks. I like to get the shocks done after turnbuckles (and early on in a build) as it means they can sit with the oil inside and get rid of all that pesky air that ruins the handling. My personal preference is for a zero rebound shock, and the easiest way to achieve this is to drill a small (tiny) 1mm hole in the top cap before building. I chose to use my own shock oil for the build (450wt from RCRacePrep) as you often find different brands of shock oils are slightly different to each other, thereby giving different feelings on track.
From the testing myself and fellow RC Xpress driver Tony McMahon have been doing, we’ve found a combination of hard damping and very soft springs to give the AT1 a very solid and drivable feel on any track surface. Forgoing the usual 4 hole piston setup, I fitted the AT1S up with 2 holes and some soft Xpress springs I had in the spares box (I will test with the stiffer pink springs included too!).
The newer composite used for the shocks feels a vast improvement from the previous XQ1S composite shocks, and they were a breeze to build and very smooth in their action. One thing I did find, I didn’t need to fit the recommended O-Rings on the ride height adjustment collars. If you do fit them, make sure you dab them on some grease or they’ll be very stiff to move when on the car.
Drivetrain
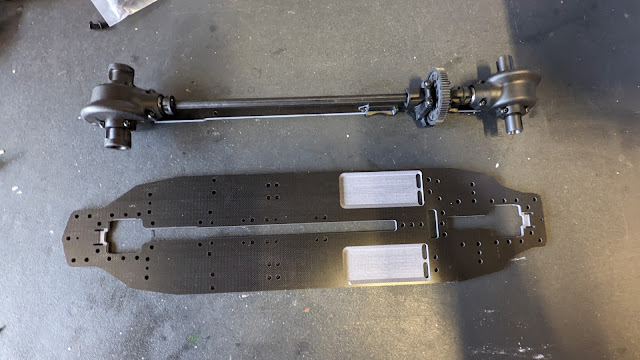
Now, this is the most important part of the car and is definitely worth taking your time over. A smooth and precise drivetrain is the forward momentum of your car. Where the power happens. Make it perfect and it will last a long old time. With the AT1, we have a lovely floating drivetrain to really eliminate the dreaded torque steer effect that plagues most shaft driven cars. With the AT1S, you get the same! But instead of the carbon, it’s all on some lovely FRP plates. You’ll get some decent flex with the FRP as well, so there should be absolute minimal torque steer when the power gets laid down in aggression.
I took my time and built the rear diff with 12k oil, This is perfect for the carpet racing I that intend to use the AT1S for. The rear diff feels every bit as smooth and supple as the more expensive AT1 diff. It’s a slightly different plastic (or at least, it’s black compared to tan) and it’s a shame it’s hidden in the diff housing, but the housing is what makes the Xpress floating drivetrain unique. The eagle eyed will also spot that I haven’t fitted the 64dp spur gear (as included in the kit) and instead gone with a 48dp as per my norm.
Why don’t I use 64dp? No other reason than I’m lazy. I find it quicker and easier to get a mesh correct with a 48dp system, and yes, it’s a bit noisier but it’s also a touch more bullet proof for the indoor racing I spend most of my time doing. I’ll also admit to the entire team being idiots to me for whining about the 64dp spur being in the kit!
My personal view is that 48dp is much more user friendly for the newcomer racer, so could Xpress maybe include both next time?
Main Chassis bits
The rest of the build is really pretty standard stuff! But first, an important tip.
With the RF, FF, FR, RF lower suspension arm holders, make sure you take the time to read the tops and get them on in the right order and places. If you get them wrong, you’ll have a horrendously handling car with some weird toe angles to really spin you hard into a wall. The pieces here are one of the changes you’ll find compared to the AT1. You don’t have the “pips” for changing the angles side to side, up and down. Of course, you can easily upgrade these pieces as and when you need to so that you can have more setup options than an F1 car.
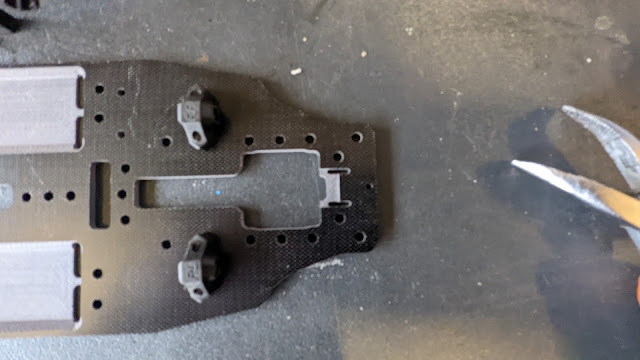
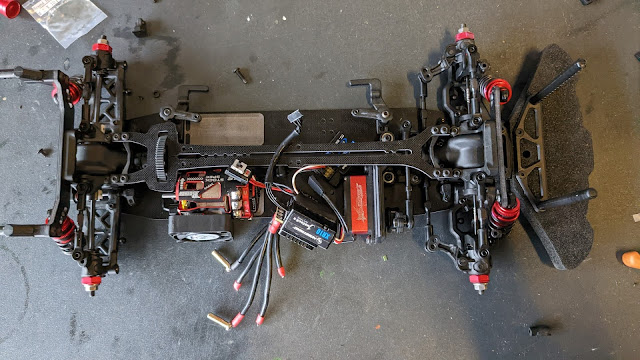
Getting all the pieces into place does take time. And, as said above, paying attention to which bit you have in your needle nose pliers will make the build streamlined. As you can see from the picture above, there are 2 small slots near the end of the chassis plate. This is for the shock mounts found on the AT1, so yes(!) you really can upgrade this car to be all singing and dancing if you want it to be.
Important point to note for the suspension. Make sure it falls nicely under its own weight. I had to run a very small reemer through one of my suspension arms just to make sure it was smooth as silk for dropping on its own weight. If your suspension is smooth, the handling is going to be smooth.
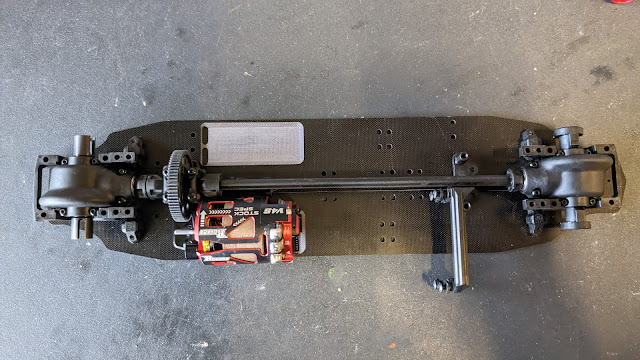
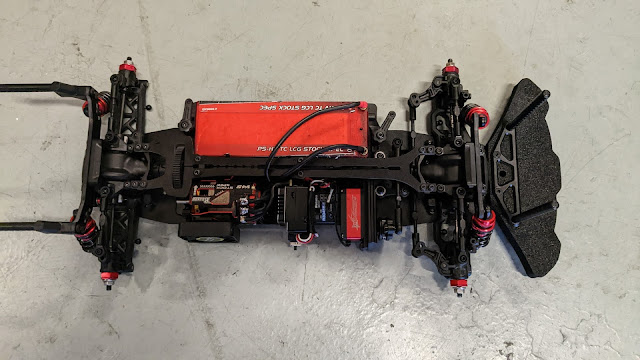
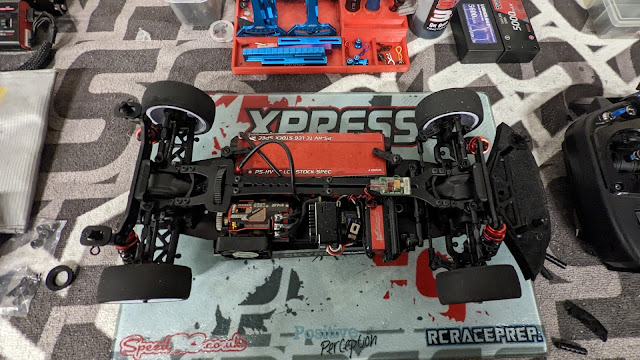
When fitting the server, make sure you use the included small inserts as they’ll locate the servo holes perfectly on to the mount and keep things nice and tight with the steering. A low profile servo is the only servo that will fit this car! You can use a full size, but then you’ll have an absolute nightmare for fitting the electrics. As you can see from above, with the motor in its lengthways position, space is really at a premium. There are multiple ways you can rotate your motor to mount it to the AT1 and AT1S. I chose the above method (after some experimentation with positions!) to be the cleanest option with decent access to solder the ESC to the motor and keeping an eye on sensor wires staying plugged in (tiny drop of threadlock is useful on the motor screw too!).
Almost there
Congratulations for getting this far and reading my ramblings. As you can see above, there’s a servo in! Plus the rest of the suspension setup is locked and loaded. I did have to use some slightly thinner shims for the rear lower arms to make sure there wasn’t any slop in the system, but it really was minimal.
Another top tip, the rear driveshafts and the white plastic drive shaft protectors. A small cup of recently boiled water goes a long way to help get the drive shaft protectors on without them breaking! Leave them in the cup for a few minutes and then get them stretched on the ends. If you don’t soften the plastic, there’s a chance they’ll snap as soon as you force them on. Speaking of driveshafts… I didn’t fit the kit supplied! Instead, I went with some double joint driveshafts. They’ll be smoother for the steering up front and generally offer a better driving experience than the single joint. You will need to source some 3mm wide bearings for the hubs to use double joint driveshafts. The kit supplied 4mm will leave no room for mounting the hex hubs.
And yes, that’s another small change I’ve made to the kit setup. I went with some 4mm hex hubs in alloy. I love the plastic ones for their lightness and ease of use. But, the alloy ones just work better and you have less annoyance of taking a wheel off to clean it, then dropping the 2mm pin somewhere onto the floor where it’s suddenly lost forever and you’re stuffed with 3wd.
Suddenly, all I had left to do was try and get all the electrics fitted to the car in a “sensible” way. Honestly, it’s one of my least favourite jobs to do on an RC car, but always one that is worth planning out ahead of getting the soldering iron hot.
Certainly with the way the motor is oriented in the AT1S makes life very awkward compared to the more traditional layout from a belt driven XQ10 or XQ2. To neaten things up, I recommend grabbing some decent length heat shrink that is wide enough to pass a futaba connector through.
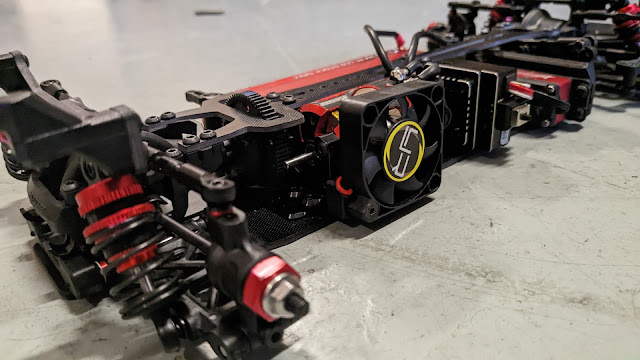
For my AT1S, I made the decision to run the wire from the fan under the motor towards the centre shaft and then into some heat shrink to protect the shaft from it. ESC wise, I fitted a trusty Hobbywing Justock G3 from my wet setup XQ10F (I plan to use the car outside as my wet car as well as indoors as my main TC).
Popping the ESC on its side gave me the best option and allowed for some airflow to head around the ESC towards the motor. You don’t necessarily need a fan on your ESC if running in 17.5t blinky, but there is still space to fit one if I decide I need to get one on. Motor fan is always essential though. Be sure to double check which size fan you’re using, as the kit comes with a mount for 30mm and 40mm. Subtly different, but make a difference to how your fan sits on the dedicated mount off the motor mount.
Completed it mate
It was done! It was finished! Couple of minor things to do once you “think” you’ve got it all done.
Get the chassis on a setup board and get your usual settings on it. My preference is for -2 degrees of camber all round, with -0.5 Toe in for the front. Droop wise, that’s very much a track dependent setting. For testing, I’ve got the AT1S setup as per my AT1 so I can easily run them back to back to see where or if the two chassis handle differently.
Testing was going to be two fold. My local club (that I’m the chairman for) holds a race meeting on a Tuesday evening, with some decent grip on the Prima GT carpet. As luck would have it, I couldn’t race the same day I had built the car. However, one week later… I was ready!
Testing times
Once a month, the club (Forest of Dean Radio Controlled Car Club) hosts a Pay&Play style, open track session where you can really get some quality testing done. With the explosion of classes we’ve had lately, we’ve had to split the track times up, so I would be sharing the track with Fronties as well as other Blinky Touring Cars.
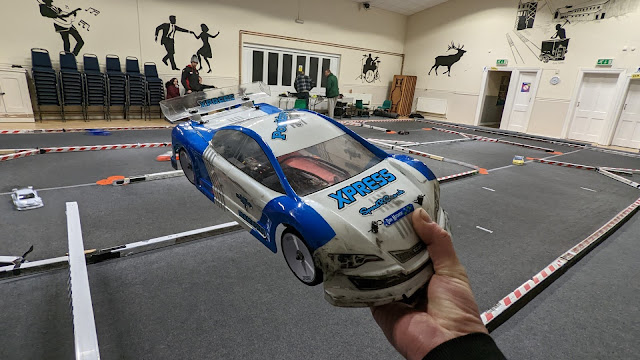
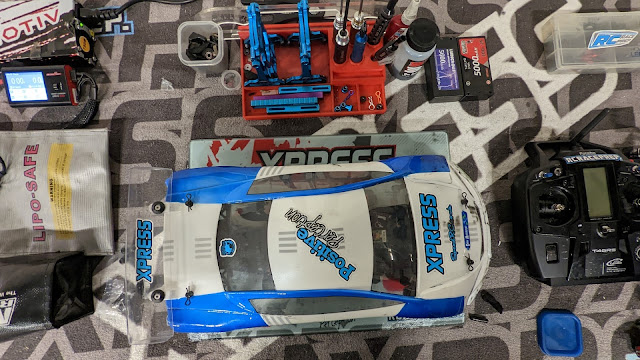
After a quick double check that my XQ10F was still all good (I’d forgotten I was racing at the weekend) it was time to prep the tyres with some sauce and get out on track. Tyres wise, I was using a set of the Xpress 28s Carpet tyres for testing, as I’d been running them lately on my AT1 and found the performance to be on a par with the Sorex 28s tyres. Additive was supplied by SXT, my favourite for carpet racing. The shell, a lightly battered Montech Racer2 (which has definitely seen way better days).
Now, as you can see from the above picture, the club track is not big at all. Measuring just 16m x 8, it’s a real test to have a clean 5 minute run, even with the relatively lower speeds of 17.5t blinky. To compensate for my over enthusiastic throttle applications, I went for a pretty high FDR at 6.11 compared to the usual 5.6 that most of the 17.5 TC drivers use at the club.
First input of the throttle on a new car is always an exciting and equally nerve-wracking experience, even more so when you realise that half the club members are watching with excitement to see the new car on track. Straight off the bat, the car was awesome. It gripped up where I expected it to, was rolling a fair bit through the chicanes, but with no ARB that was always going to be the case! I could certainly feel some mid corner understeer as I got back onto the throttle to exit the tighter corners but overall, the car was solid. Absolutely brilliant to drive for the first time out and a check of my fastest lap after a run confirmed that. My fastest laps with the AT1 on the same layout, 7.03s. My best with the AT1S on its maiden voyage, 7.06s. Great scot!
Not being one to believe everything without going back out to verify, I decided to do one more run. Same tyres. Same additive time. Same setup. And again, the AT1S was really living up to its value for money! A slightly slower (0.05s) best lap time, but the consistency was better with only 1/10th of a second between best lap and best 10 laps. The car is incredibly stable and really consistent throughout an entire run!
For my final blast (wish I hadn’t had to double check my frontie still worked!) I made one minor change. Dropped the front shocks over by 1 “click” to soften up the initial steering and make it feel a bit less “darty” when entering a corner, which would also stabilise the suspension front the rear when exiting a corner on power.
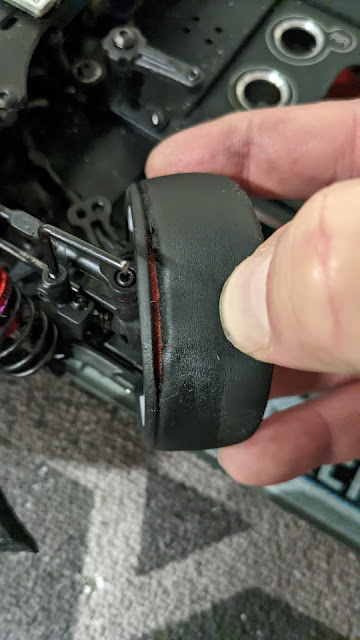
The change worked. The car felt incredibly planted and stable, but… towards the end of the run it was feeling a tad unstable in the mid corner again. I did set my best ever lap time though, with a 6.97s fastest, and a best 10 average of 7.21. A quick check at the pit table before packing up, I found the problem. The Xpress 28s tyres had gone, and gone in a mega way! Split the tyre with a ring of death that went right through to the tyre insert.
Opps. Interesting that those tyres had their best lap time in their dying moments though! Certainly a decent club tyre, but they need rotating around the car to get the absolute most life out of them. I’d done 15 runs in total with these particular ones, and always had them fitted to the same corners of the cars I’d tested them on.

