

Fiberglass a Wing – Tips for producing a smooth surface
There are some ways to use fiberglass fabric to a construction. The most typical strategies use both polyester or epoxy resin and catalysts. Some of the resins require unequal combine ratios, like one half epoxy to 2 elements hardener, which is troublesome to measure precisely. I additionally dislike polyester resin as a result of it actually smells foul. For all these causes, I take advantage of Pacer Technology’s Z-Poxy Finishing Resin (#PT40). It is an equal-mix product that has little to no odor and is straightforward to work with. Cure time to a cheesy consistency is about 30 to 45 minutes. After about two hours you’ll be able to deal with it, and after 4 to 5 hours, you’ll be able to sand it or apply one other coat. Even when you’ve got by no means achieved this earlier than, it’s very easy to do.
LET’S GET STARTED
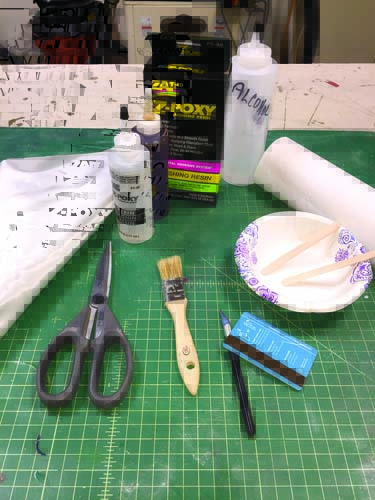
Some gadgets you’ll need are paper towels, 1-inch hardware-store chip brushes, one thing stiff to make use of as a “squeegee” (a bank card works nice, as do plastic-coated taking part in playing cards), a interest knife with no. 11 blades, Z-Poxy Finishing Resin, and a few denatured alcohol. A flat floor, like an previous desk or workbench, coated with newsprint or another disposable overlaying is superb for setting elements on. You can even want some 100- and 220-grit sandpaper to easy out your prep work. A rubber sanding block, out there at most {hardware} shops, will assist enormously. Oh sure, and a few 5-oz. disposable ingesting cups can be helpful for mixing the resin.
Keep in thoughts that different-weight fiberglass cloths (from 3/4 to three oz.) work in a different way. The heavier the fabric, the extra cussed it might be to put down correctly—be affected person.
Whether it’s a one-piece or a two-piece wing, fake that it’s divided into 4 quadrants: high left, high proper, backside left, and backside proper. It doesn’t make a distinction which part you begin with. If you have got removable ailerons and flaps, take away them and do them individually. Now, let’s get right down to enterprise.
PREPARATION
Before you begin the primary panel, guarantee that the entire wing has been finish-sanded with 220-grit sandpaper after which vacuumed clear. Do the opposite three panels in the identical method. If your balsa wing has any dents in it, spray the dented space with a bit water and gently rub it into the dent. Let the world dry out; the wooden grain will raise barely, inflicting the dent to fade like magic! The normal thought right here is to have easy, flat, ding-free surfaces over which to put your fiberglass fabric.
As far as fiberglass fabric goes, my fundamental information to what weight to make use of is instantly associated to airplane dimension. For fashions with wingspans within the 80-inch vary, you should utilize something from 3/4- to 1 1/2-oz. fabric. Anything 100 inches and over, I take advantage of 2- to 3-oz. fabric. You get the concept. To discover the place to purchase your glass fabric, test interest outlets or massive distributors. You may also store round your native boat/marine {hardware} shops for the fabric you want.
Now, measure your wing panels and permit at the least an inch of waste materials all the best way round. After slicing your first piece of material, lay it on high of the wing panel and rub your hand over it to guarantee that there’s nothing beneath it, as any speck of sanding mud will wreck the end.
THE GLASS ACT
For the primary coat of resin, I add about 5 to 10 % alcohol to the resin. This just isn’t actually really helpful by the producer due to the variances of alcohol used, nevertheless it helps the fabric lie down simpler with out pulling it out of form whereas making use of the resin. When you apply the second coat of resin, nonetheless, use it full power. Mix the resin elements collectively fully, add the alcohol, and blend once more till the alcohol is totally built-in.
Lay the fabric down over the naked balsa, being certain that it lies down fully easy. Pour a small line of the combined resin down the middle of the wing panel spanwise, and unfold it out from the middle to the main or trailing edge—it doesn’t matter which—then do the remaining. Keep a disposable ingesting cup helpful to squeegee off extra resin out of your credit score or taking part in card. Paper towels are good to have round, too, in addition to a 1-inch chip brush to brush down the perimeters and areas that you simply missed.
Now, spend a while going over these areas; fixing it now makes life quite a bit simpler in a while. By this time, your arms will really feel as when you simply dealt with a big ball of cotton sweet—good and sticky. Wipe your self and any instruments you want to hold clear utilizing a paper towel and a few alcohol. Trust me—after you have accomplished the primary panel, you can see the opposite three will go a lot sooner.
I often do the top-left panel adopted by the top-right panel after which let remedy. I trim the perimeters with a no. 11 interest blade after which calmly sand the perimeters all the best way round. I flip the wing panels over and apply fabric to the opposite facet. Don’t construct up an excessive amount of resin close to any edges as a result of, when it cures, you’ll simply have extra resin to sand off.
After you’ve achieved all 4 panels they usually’re all totally cured, revisit the primary panel and really calmly sand and repair any little imperfections or dings that you simply might need picked up. If you have got any wrinkles, bubbles, or brush hairs, now’s the time to sand them away. If you should sand down up to now via the fabric and resin that it leaves a naked spot, don’t fear. You can lower a small piece of material and put it down with the second coat of resin, or if it’s sufficiently small (like the dimensions of 1 / 4), simply ignore it and put down the second coat of resin instantly over the naked wooden. Go over the opposite three panels and do the identical factor.
As for the wingtips, I merely trim near the wing, apply resin, let remedy, after which sand. If wanted, I’ll add scrap fabric to cowl any naked spots. When you have got all 4 panels achieved with two coats of resin and they’re totally cured, use the sanding block to sand the wing easy. You will discover that the second coat of resin has cured pretty shiny. This is as a result of it simply lies on high and doesn’t take in in any respect into the wooden or the glass fabric. Use 100-grit sandpaper over the shiny surfaces to “break” the shine, then change over to a finer-grit sandpaper, like 220, to finish-sand the entire panel. Remember that while you sand the fabric, watch out to not undergo to reveal wooden. The distinction now between an excellent wing floor and an impressive one is how a lot time you spend sanding the wing.
When you have got the whole wing completed as talked about above, you might be nearly achieved. For me, the subsequent half is the ultimate step. Find a well-ventilated space, and get some Rust-Oleum Automotive grey primer (a median rattle can will cowl about 4 sq. ft) and calmly spray the wing panels. The primer will expose any flaws left in your fiberglass surfaces. Fill any pinholes or dings utilizing a lacquer spot putty or Bondo, let dry, and sand and primer once more.
Now you might be prepared to color your wing! No matter the way you select to complete it, the graceful fiberglass will improve your mannequin’s general look.
WHAT YOU’LL NEED
Here’s what you’ll want for this mission. The elements proven listed below are wanted to start out the mission. The technique I take advantage of will work with any resin, whether or not it’s polyester or epoxy primarily based; I selected this Z-Poxy product as a result of I take pleasure in its working traits. Your scissors have to be sharp. I take advantage of denatured alcohol for thinning or cleansing up the instruments, however rubbing alcohol can even work.
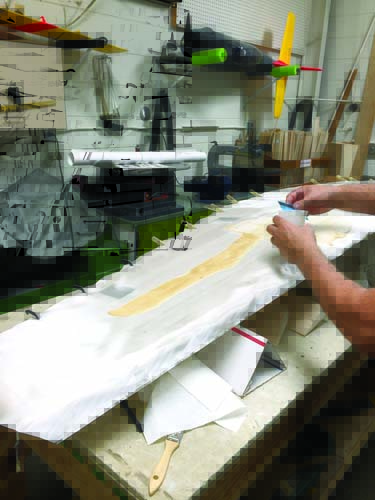
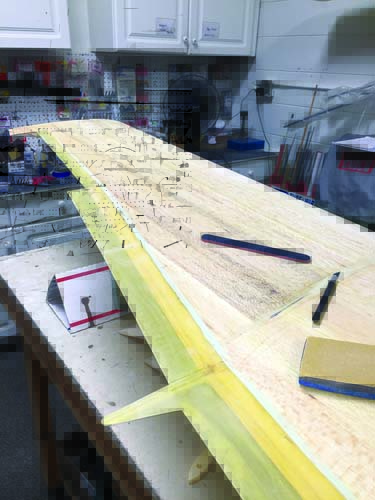
I lower the fabric a bit oversize, lay it over the floor, and dry-brush any wrinkles out. I pour the combined Z-Poxy down the middle, from root to tip (as proven), and put together to “squeegee” the resin via the fabric.
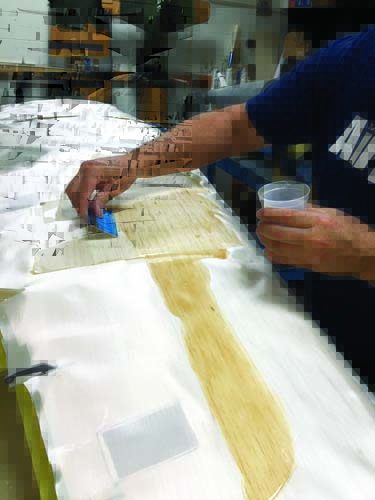
Using a clear bank card or plastic spreader, I unfold the resin towards the main and trailing edges, to a degree the place there aren’t any ridges of resin seen.
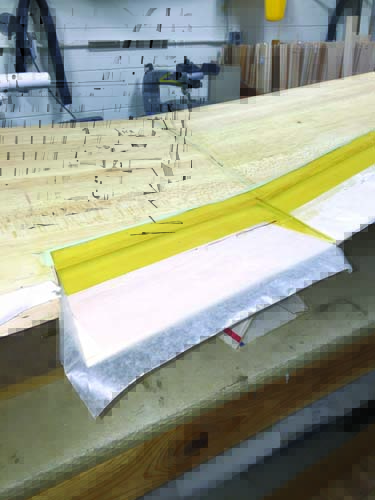
After fully spreading the resin, that is what the floor will appear to be. When the resin has cured, the surplus fiberglass fabric may be simply trimmed utilizing a single-edge razor blade or calmly sanded utilizing a sanding block. Here, the wax paper protects the flaps from the resin, however the flaps are in solely to guarantee that the trailing edge cured straight; usually, I’d take the flaps out.
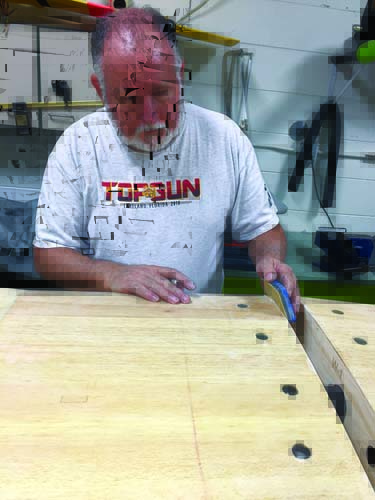
Notice how neat and clear the surfaces seem after sanding the second coat of resin. All surfaces are actually prepared for primer. Because the second coat of resin doesn’t seep into the wooden grain, it varieties a crisp topcoat layer, which could be very shiny. Sanding it till boring is acceptable.
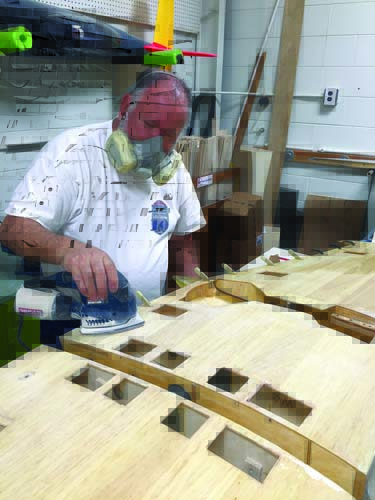
A small vibrating sander may be useful in breaking down the shiny topcoat of resin. The extra stress you apply, the sooner it really works. But watch out to not apply an excessive amount of stress on the corners—you might undergo your fabric!
The fiberglassed and sanded wing panels for the massive Hellcat I’m engaged on are nearly prepared for primer, as quickly as I finish-sand the inboard edges of the panels.
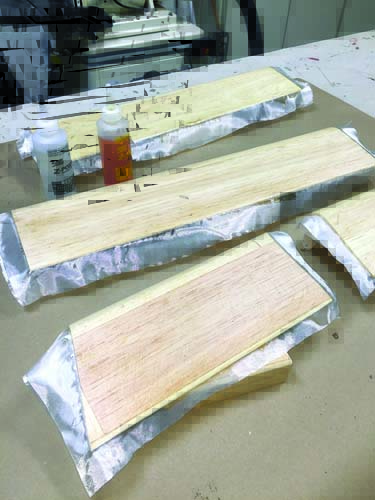
The similar fundamental method is completed for all management surfaces, as proven right here. The elements are put aside till the resin cures, then the surplus fabric is trimmed away and sanded easy utilizing sandpaper.
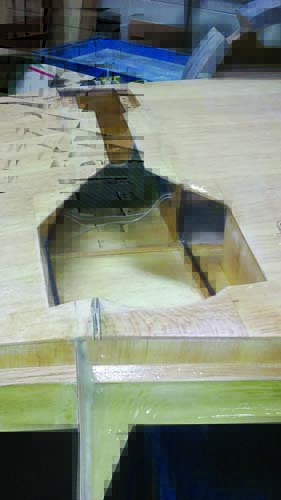
For power, I all the time glass the wheel-well interiors.
By Denny Deweese