

Easy Rivets & Details – Quick and simple ways to add realism to your ARF warbird
Regardless of your mannequin’s colour, including some visible floor element helps your aircraft achieve depth and realism. Here’s how I added a contact of element to the all-blue scheme of a giant-scale Top Flite F4U Corsair ARF with some fundamental strategies and provides.
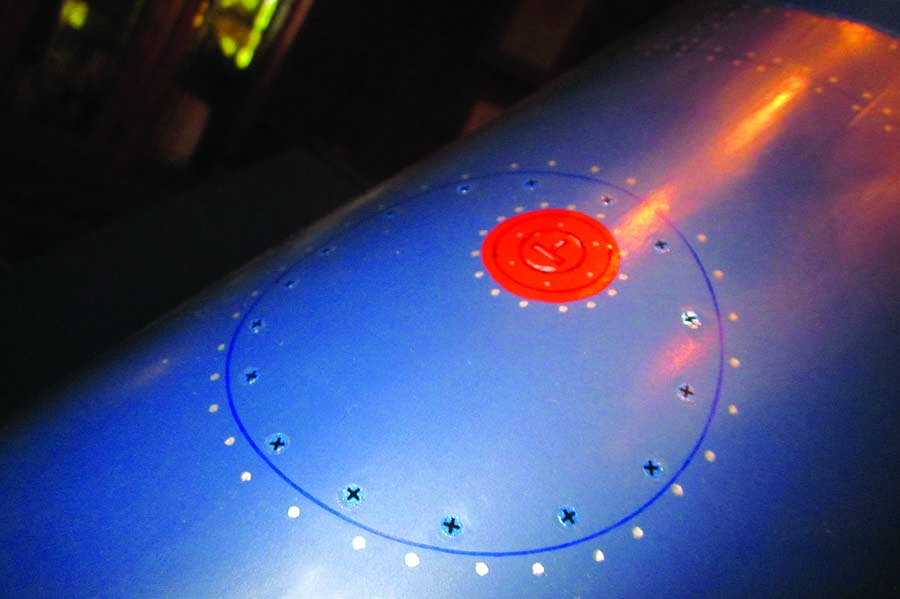
The approach for making use of panel traces with a pen has been round for a very long time, however effective, felt-tip pens actually make the duty easy. First, clear the floor of your aircraft and actually degrease it so the ink will final. You additionally want some versatile, straightedge rulers, and a few fundamental templates to make small panels and circles for issues just like the fuel-tank filler. Templates of assorted sizes can be found at most workplace provide shops. Scale colour profile drawings from aviation books and on-line drawings and photographs are also useful guides for element placement. Remember, this isn’t a full-blown detailing remedy. I simply needed so as to add a touch of element so as to add some eye-candy to an in any other case easy, film-covered ARF.
The colour of your airplane will dictate what coloured pens to make use of. Straight black shouldn’t be actually a sensible choice for the Corsair. Since there aren’t that many flying Corsairs round, I went to native museums to get a really feel for what I needed my Corsair to seem like. The white panel traces typically seen on museum plane (the place wax has constructed up inside) was too overpowering, so I went with darkish blue.
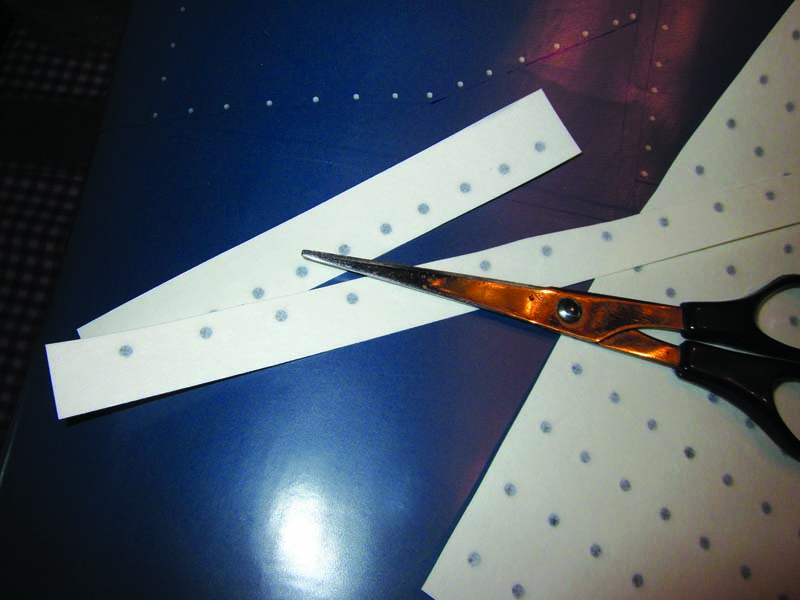
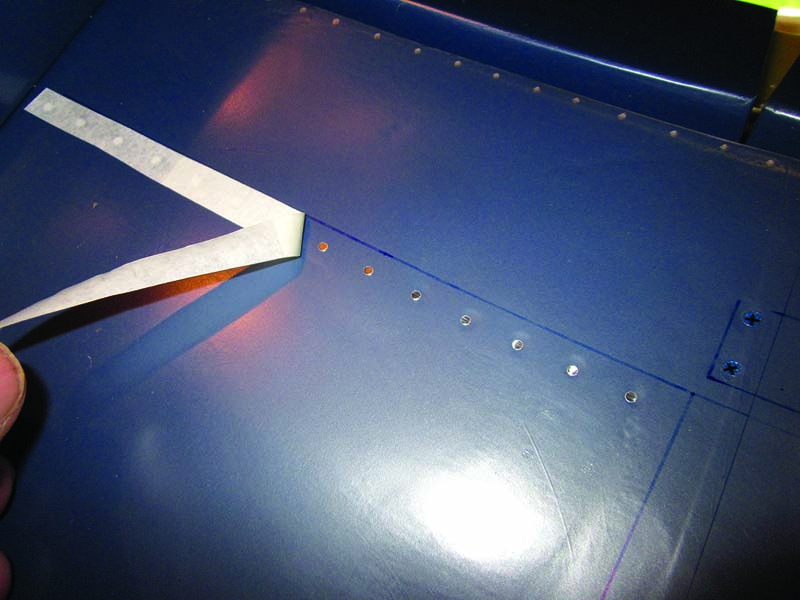
Many full-size Corsairs operated in harsh situations, and the rivets shortly began to point out by means of. I replicated them with a daily felt-tip pen. I used silver pen rivets on many of the airframe, however in areas the place there’s extra element to attract consideration, I used vinyl rub-on graphics (cwvmodels.com). These markings work nice, go on shortly, and are printed in sheets so you possibly can lower them to size and apply a row at a time. The spacing within the rows and columns are totally different, so relying on the course of your lower, you possibly can range the spacing of the screws and rivets utilized to the mannequin.
Application
Using your 3-view drawing as a information, lay out your main panel traces utilizing a protracted, straightedge. A superb factor right here is that when you mess up, you possibly can merely wipe the ink away with a solvent like MEK or acetone, and do it over once more. Use rubber gloves when dealing with any solvent chemical substances. I work on one part at a time and full it earlier than transferring on. I first laid out the outer wing panel traces after which did the wing middle part. After that, I did the tail surfaces after which marked out the proper and left sides. I completed up by including the element to the highest after which the underside of the fuselage. I’d draw the traces proper over your plane markings.
After the panel traces are full, use a silver felt-tip pen and begin including the rivet particulars shut to 1 aspect of the road. Try to maintain them evenly spaced. After some time, you’ll be making use of the rivets at a reasonably fast tempo. Again, use solvent to “fix” any errors. For hatches and upkeep panels, flush screw heads are used. To rub the markings into place, use a easy propeller blade as a burnishing software. This helps forestall denting the comfortable balsa floor beneath the movie overlaying.
That’s it. Go over the remainder of your mannequin and add as a lot element as you want. If you are typically somewhat lazy, you don’t even need to do the underside! To seal the element, go over the mannequin with a transparent coat and mist it over the main points. You actually don’t have to do that, because it takes solely minutes to redraw particulars that put on away. Have enjoyable!
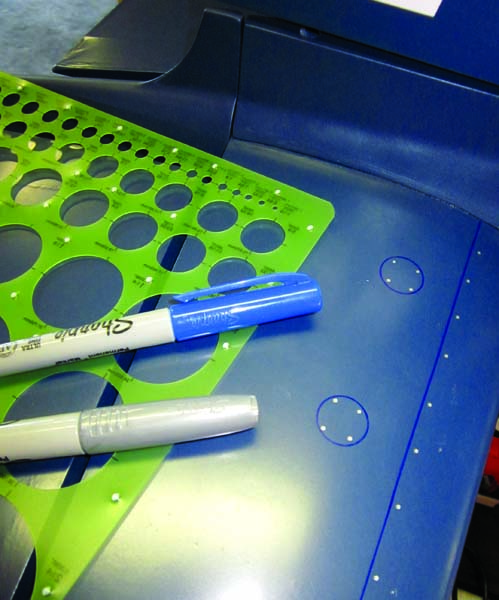
Templates from an workplace provide retailer work very nicely for including round panel element.
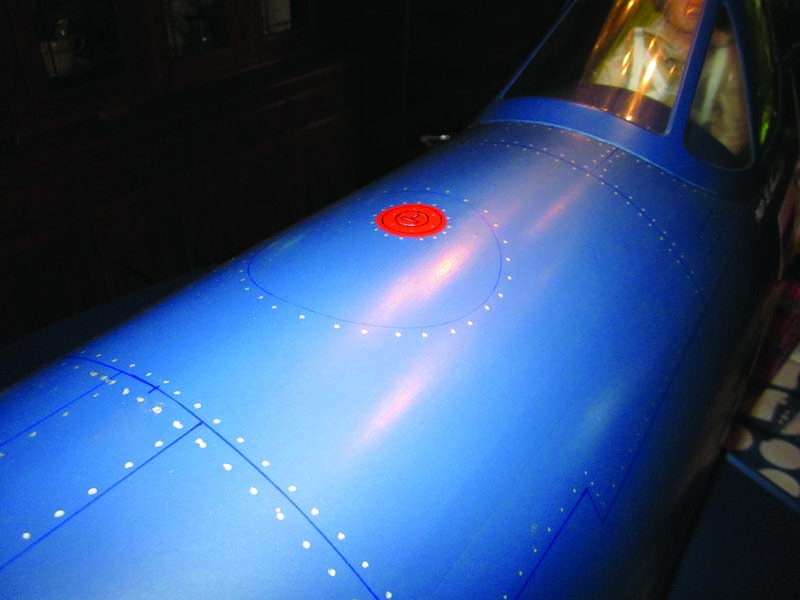
Here you see the highest and aspect of the fuselage. The gas filler cap is made with a circle of crimson MonoKote ironed in place. The element on the cap was carried out with a template.
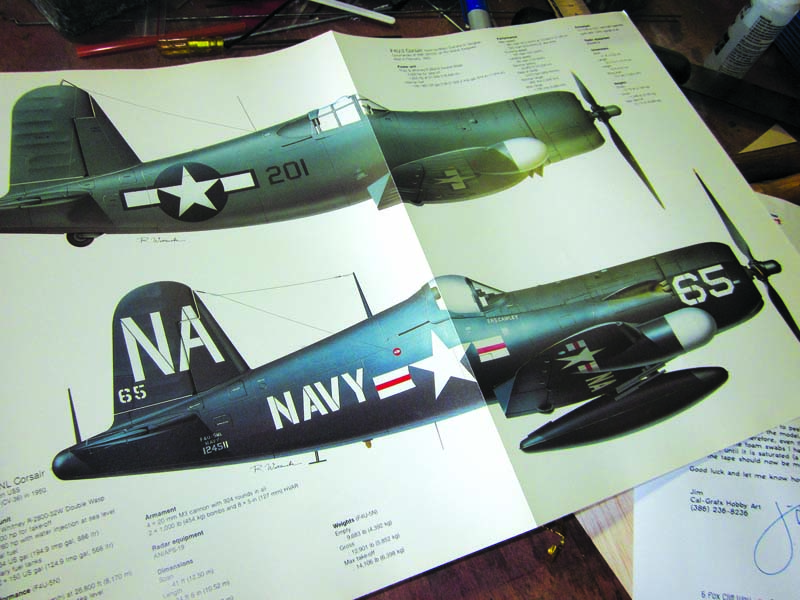
Use scale profile drawings as a information for element placement.
The rivet head and rivet graphics are available in sheets and could be lower into strips for straightforward utility. Notice the totally different spacing on the 2 strips.
Here the silver flush head rivets are being utilized to the wing middle part.
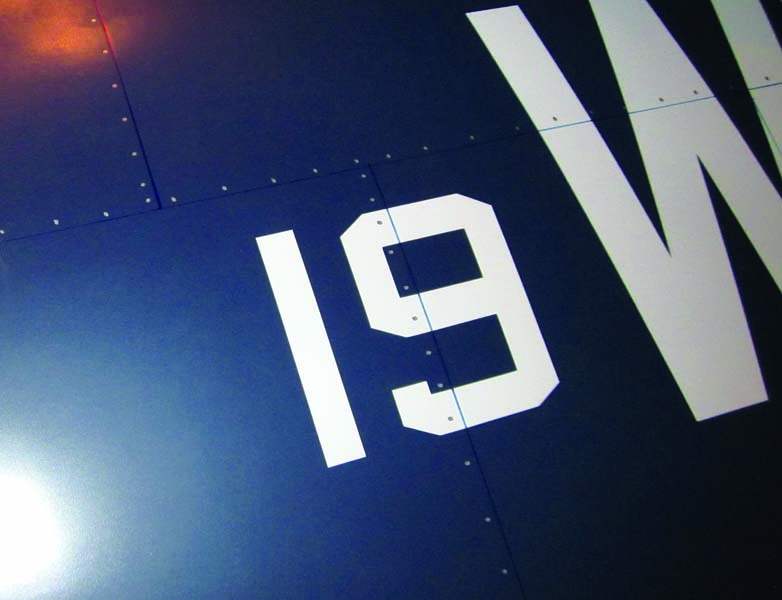
When you apply the panel traces and rivets, apply them proper over your mannequin’s markings. It provides depth and realism.
Here’s the completed gas tank detailing with the printed screw heads added to the entry panel. This is a really particular element for all Corsair fashions.
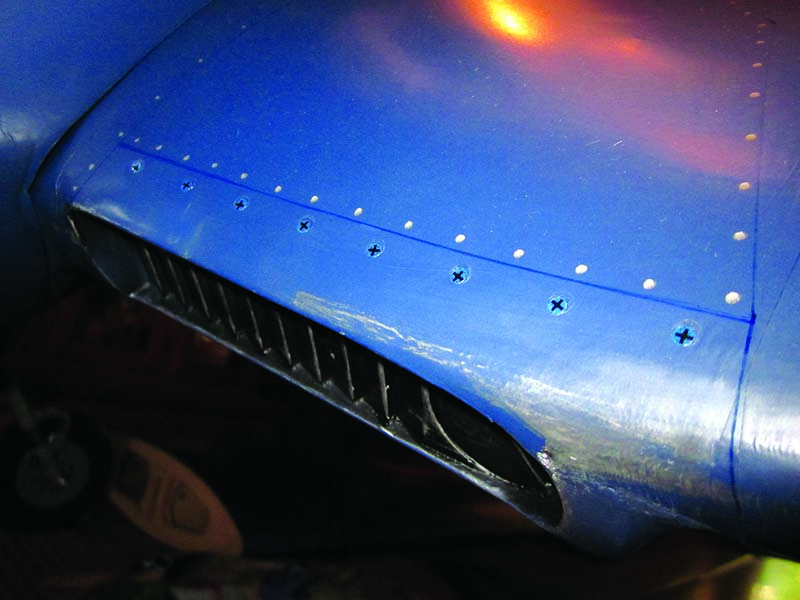
A typical place for screw heads is on the wing vanguard alongside the radiator inlet cowl panels.
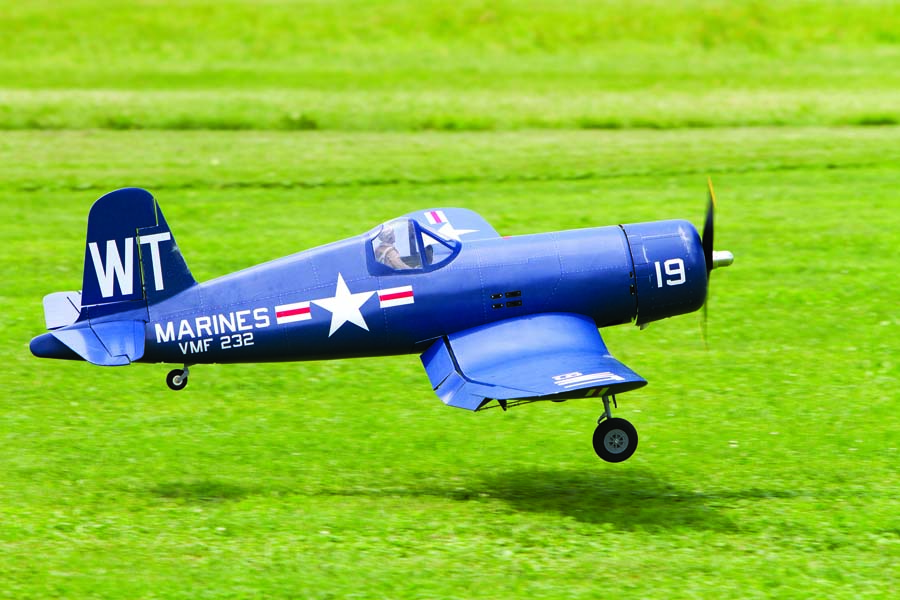
Here you possibly can see that even throughout touchdown, the delicate utility of panel traces and silver rivets provides realism to the all-blue Corsair. Nice eye-candy!
By Gerry Yarrish