

Whenever somebody appears to be like at a mannequin airplane, their eyes are interested in the cockpit. It appears solely pure to anticipate one thing fascinating inside. Although it could appear daunting to construct an instrument panel, when first beginning out, preserve it easy. You don’t want a lot of a cockpit inside to make it eye-catching.
GETTING STARTED
To make an instrument panel, you solely want three fundamental elements: First is a backplate of the instrument panel. This will function the world the place the instrument faces will probably be positioned. Second is an instrument panel face. And third are the instrument bezels.
This skinny plywood face has cutouts for the devices.
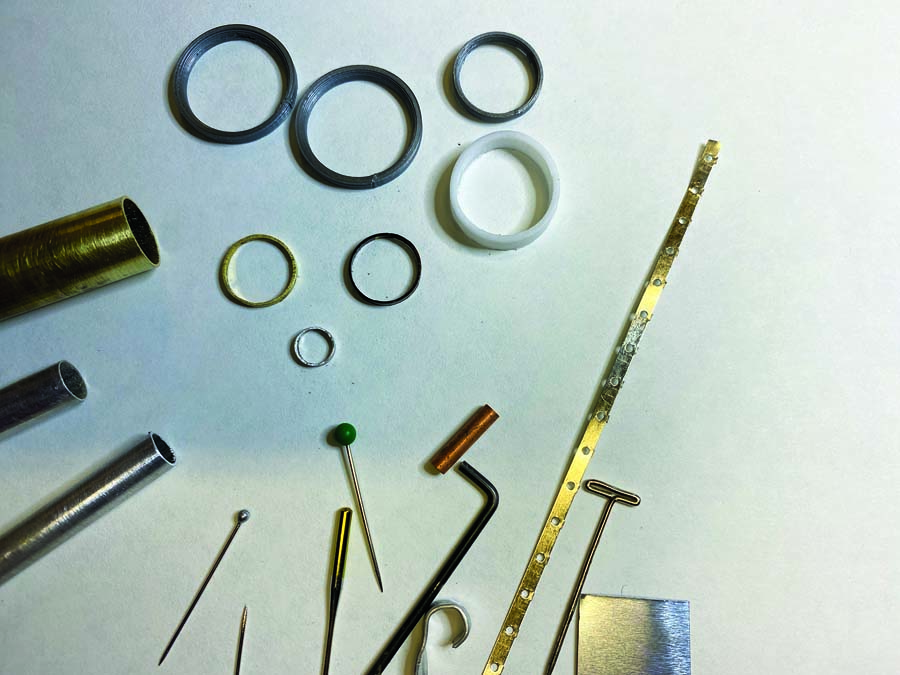
You could make bezels by slicing inflexible plastic or aluminum tubes, and pinheads of varied sizes can function switches. Your scrap field is a treasure-trove!
Aircraft like Cessna 172s have fundamental instrument panels with out a number of bezels.
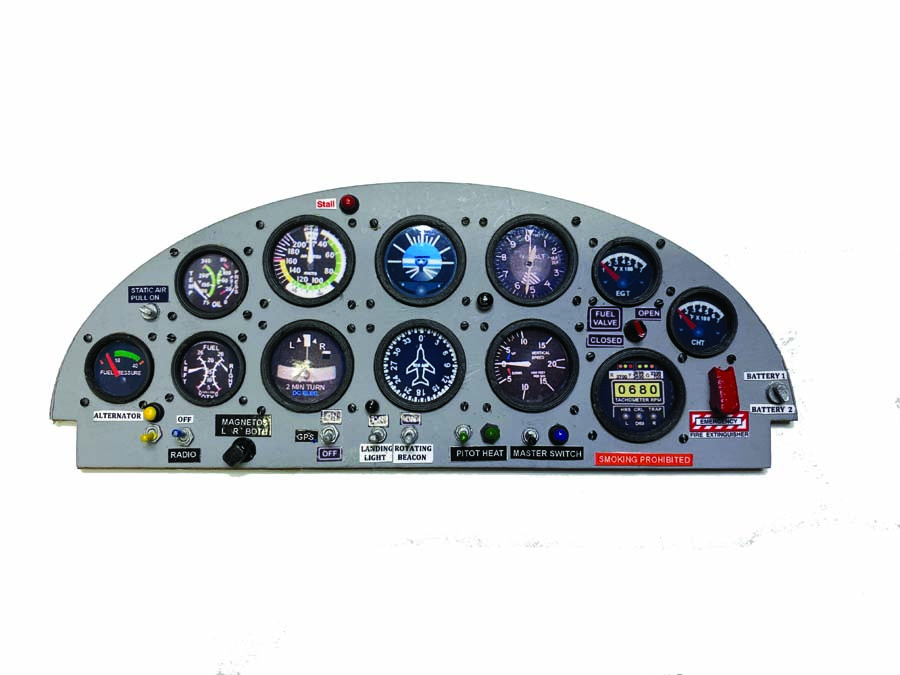
With bezels, switches, simulated lights, and placards, this instrument panel is able to gown up any ARF!
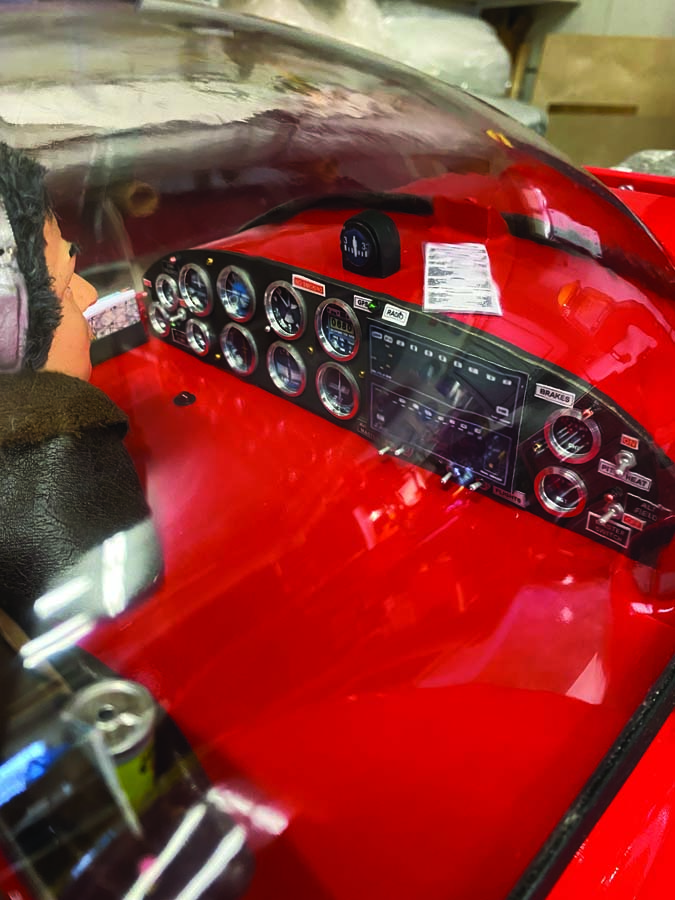
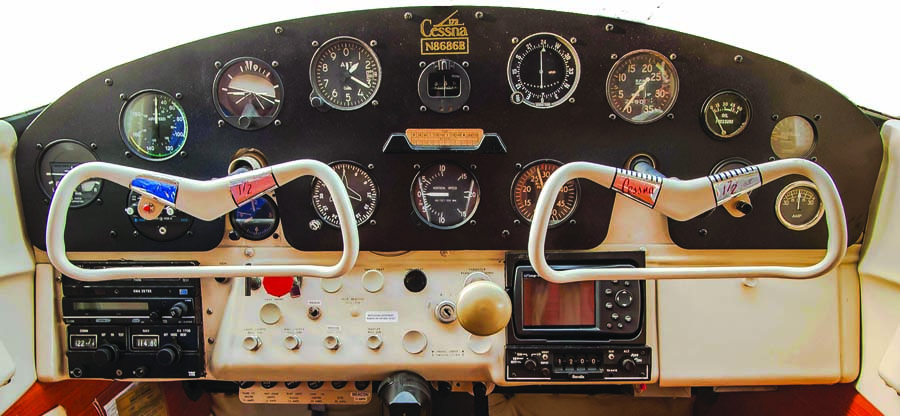
With such a big bubble cover, the instrument panel of the CAP 10 will instantly catch your consideration!
Although bezels have a pleasant impact, they aren’t essentially required in all circumstances. There are airplanes with instrument panels that don’t present any sort of bezels and as a substitute have a flush look, reminiscent of a Cessna 172 proven right here. If you make an instrument panel for a standoff scale or sport airplane, you’ll be able to skip including bezels. However, when you resolve to incorporate bezels, you have got some choices. They might be present in many various sizes from varied on-line sellers. Or when you personal a 3D printer or know somebody who does, bezels might be printed to your necessities. Another manner is to make use of aluminum tube and a Dremel cutoff noticed to make them. If you solely want just a few, this methodology works effectively and the burden acquire is negligible. If aluminum tube just isn’t accessible, attempt utilizing inflexible plastic tube.
As for the instrument faces, there are numerous on-line sources for each sort of instrument. When it involves standoff scale or sport fashions, you’ll be able to select what suits the look you might be after. You can copy the picture and resize it in your pc after which it’s merely a matter of slicing and pasting. The instrument faces will also be bought, normally by the identical firm supplying the bezels. I’ve even seen instrument faces that have been reduce out of magazines!
PUTTING THE PANEL TOGETHER
STEP 1
The backplate, which is identical measurement and form because the instrument panel, might be comprised of skinny balsa or cardboard.
STEP 2
If you printed your individual instrument faces and you might be utilizing them in a standoff scale or sport airplane, I recommend printing them on shiny picture paper to provide the impact of glass over the instrument face. It is surprisingly efficient. However, if you’re in search of extra of a scale look, you’ll be able to place very skinny self-adhesive plastic movie between the again plate and the panel face.
STEP 3
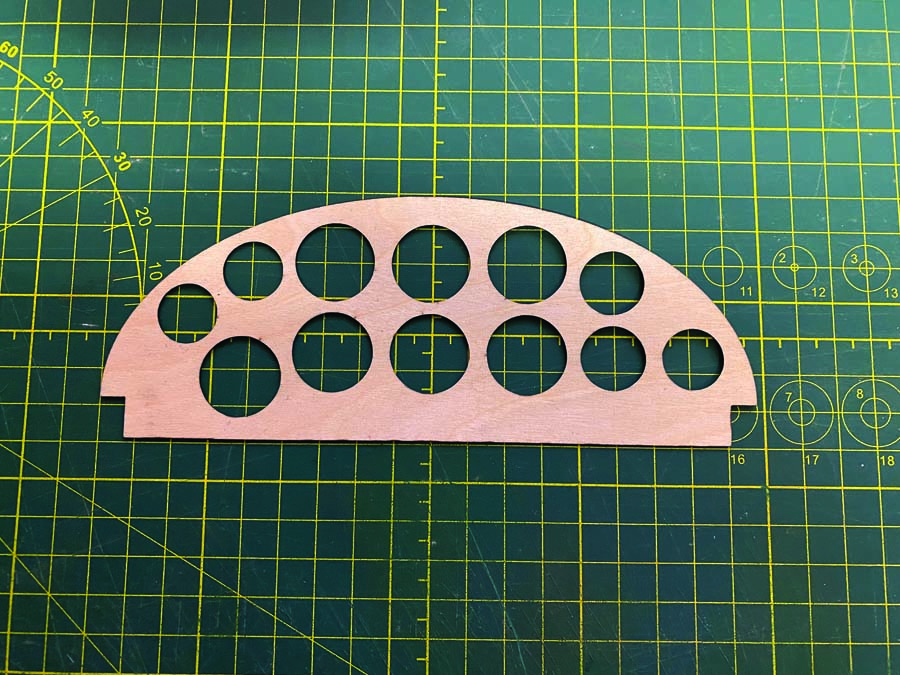
The instrument panel should be reduce out for the instrument faces. This can even function your template to mark the location of the devices on the again plate. The instrument panel face might be comprised of 1/64-inch-thick birch plywood, which has a really superb grain and is simple to complete to acquire a clean metallic look. Due to how skinny it’s, it is vitally simple to chop out the instrument cutouts.
Balsa wooden can be utilized and works effectively however requires extra ending attributable to its grain. There are varied methods to make the instrument cutouts on the panel. You may use a laser cutter if accessible. Another methodology I’ve used is a brass tube, which is available in many various diameters. Sharpen one finish with a file, and use it as a drill or a punch. Drill bits additionally work, however it may be a problem to realize a really clear reduce with that methodology.
STEP 4
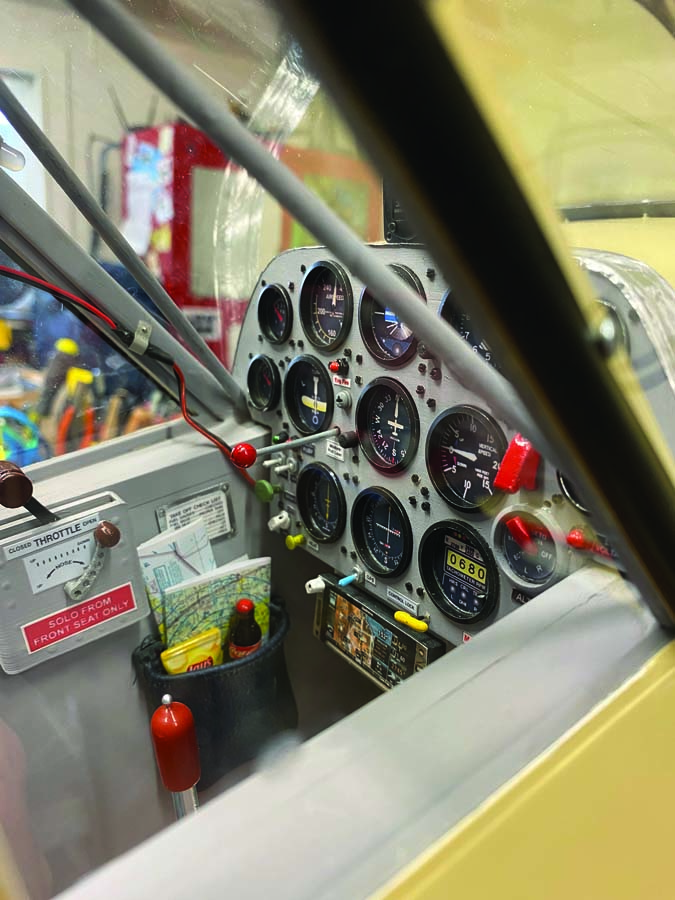
Now take your instrument panel plate with the cutouts and, utilizing it as a template, draw the place for the instrument faces on the backplate. Then glue your instrument faces to the backplate with a glue stick or Zap cover glue. Use a glue that can assist you to transfer the instrument face to its precise place. Do not use CA! As a aspect word, the location of flight devices usually has a sample sometimes called a “six pack.”
Now place the instrument panel face on high of the backplate with the instrument faces whereas making any changes to the instrument faces, making certain all the things is aligned. When you might be happy with the look of your panel place and instrument faces, glue on the panel. I exploit a 5-minute epoxy so I’ve time to line up the panel precisely the best way I would like it.
If you want, apply miniature screws to the panel to provide a sensible look, as that’s how actual devices are hooked up in airplanes. I’ve purchased miniature screws from a mannequin railroad store and varied distributors that promote cockpit elements. To set up the screws, merely drill the suitable measurement holes and push the screws into the holes (don’t screw them in). I exploit a small hand drill to make the holes and drill proper by way of the backplate. Don’t attempt to glue the screws when inserting them within the holes. When all of the screws are in place, flip the panel over to the again aspect and you will note the holes you drilled for them. You can now use medium CA glue and put a small drop on each screw gap. If you attempt to glue the screws from the entrance panel aspect, you danger getting glue on the panel. I communicate from expertise!
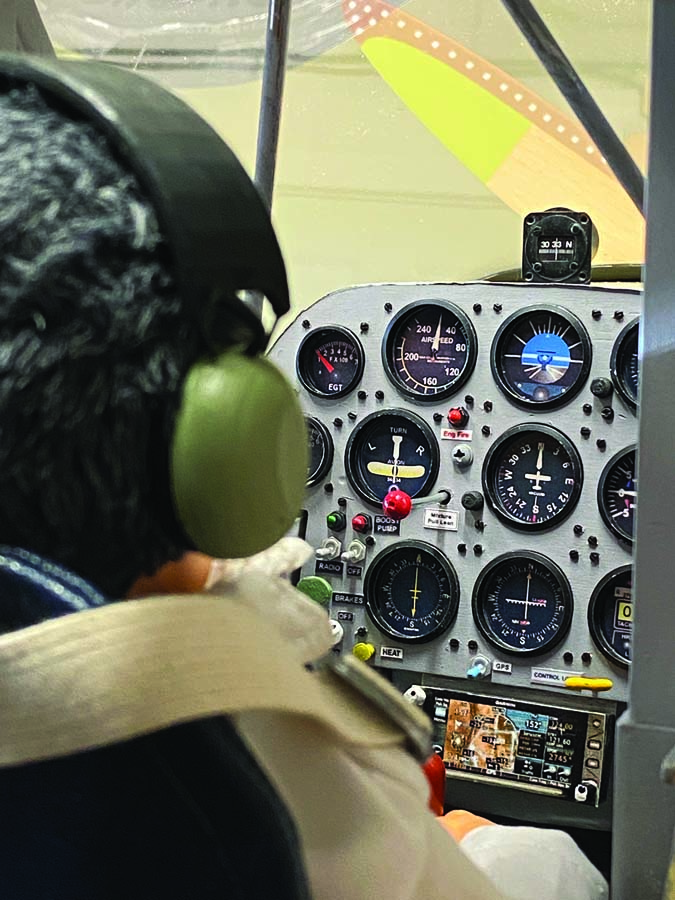
When you have got decided what you need your panel to seem like to go well with the plane you might be constructing, it’s time to set up switches and lights. If you have got entry to a 3D printer, you might print the required elements, or you should buy them from varied distributors. You can also be capable to discover a few of these elements proper in your store by in search of small objects that resemble one thing you may even see on an instrument panel. For instance, in my World War 1 airplane, I made some elements from small items of scraps that I by no means throw out, reminiscent of brass tube, and many others.
To end detailing the panel, you’ll want to use the suitable labels and placards. Using a phrase processor in your pc, you may make varied measurement labels. Then use shiny or satin end picture paper to print the labels. When making use of the switches, lights or labels, I exploit a toothpick to exactly management the appliance of glue and use as little glue as potential.
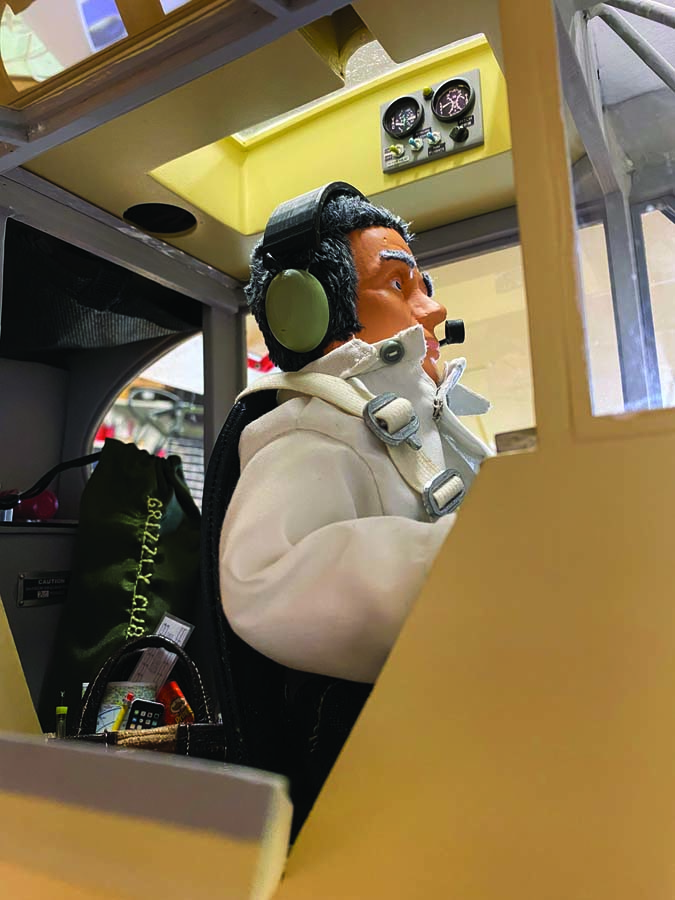
You can now set up your accomplished panel within the airplane and admire the transformation of the mannequin. Don’t neglect the pilot! The airplane appears to be like unusual being flown by a ghost! For extra ideas and methods on creating and putting in instrument panels, see my video at ModelAirplaneNews.com/panel.
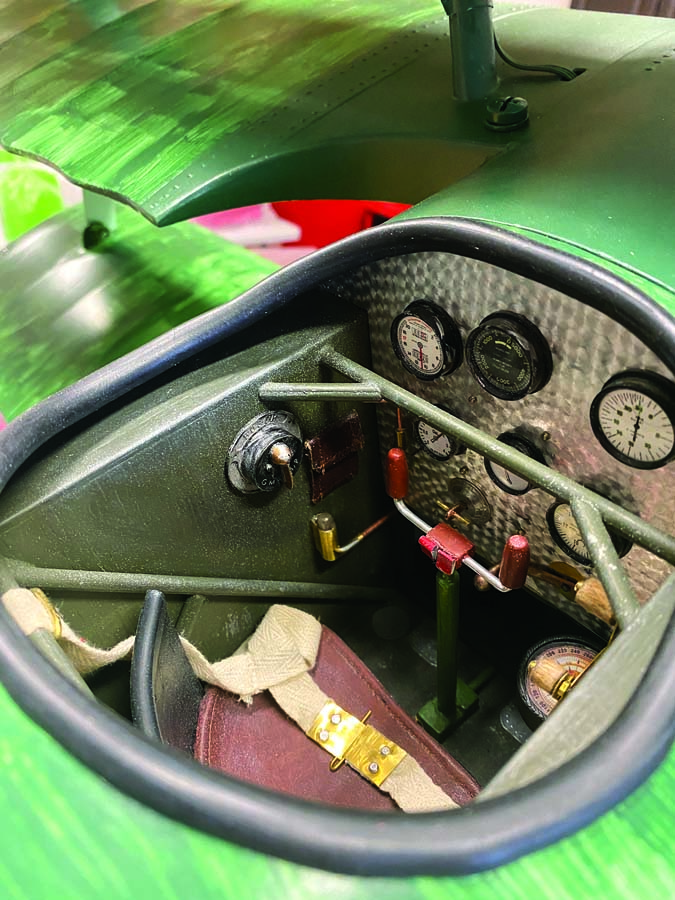
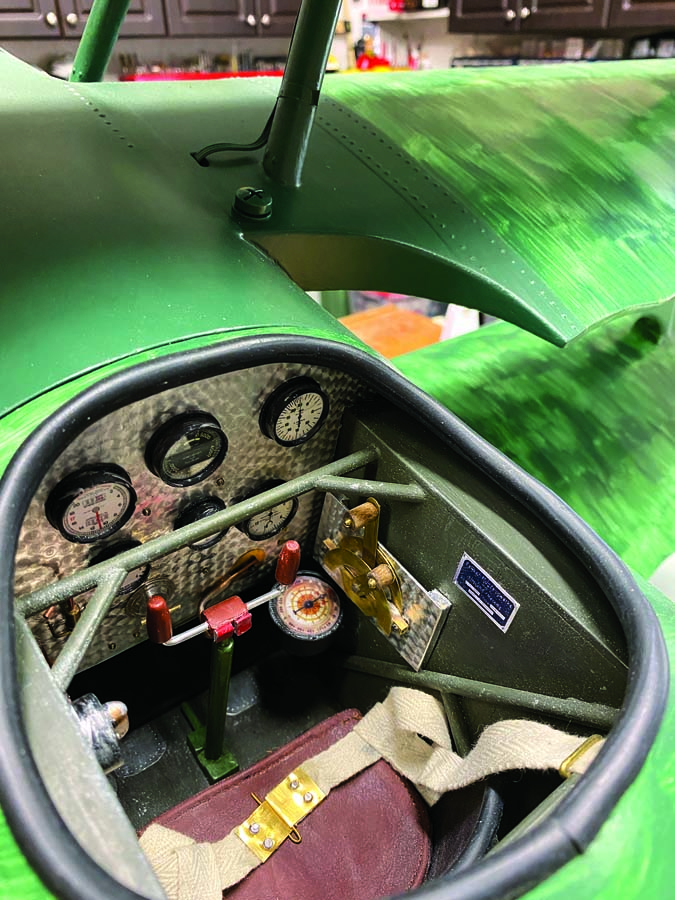
Standoff scale Fokker Dr1 cockpit added.
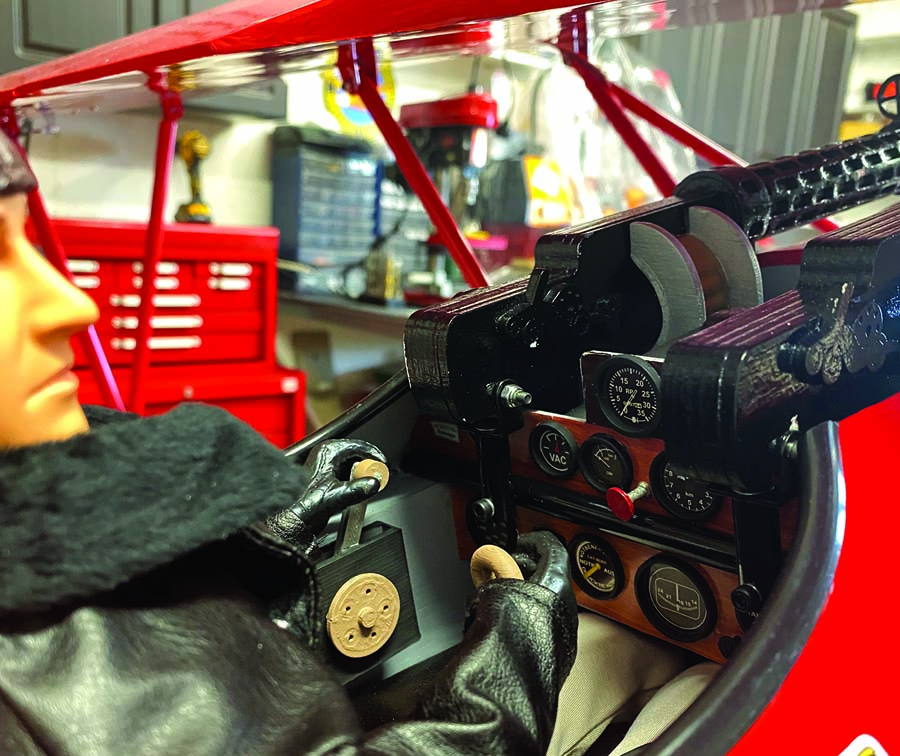
Several elements are bits and items of scrap materials remodeled into cockpit elements.
Hangar 9 Fokker D-Vll cockpit remodeled from a decal instrument panel and shoulder pilot to one thing just a little extra life like with added bezels, elements, and a full-body pilot from Warbird Pilots.
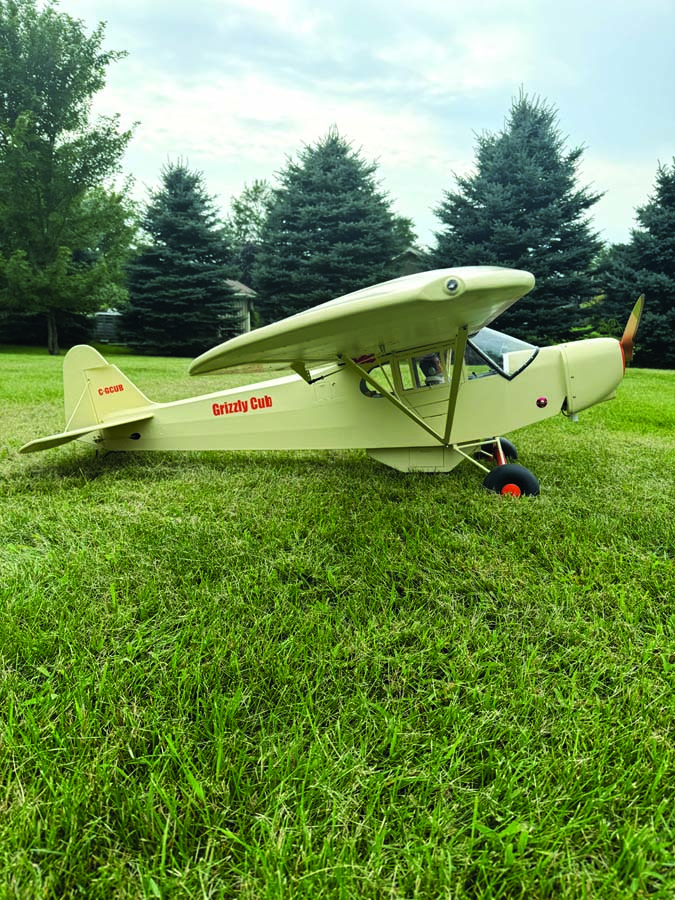
Inside the Grizzly Cub
This 1/4-scale Cub has been modified to resemble a personalized Super Cub. I constructed it utilizing Sig Cub plans. The mannequin is roofed with Koverall cloth, has a lighting system and is powered by a DLE 35 engine with an electrical begin. This cockpit has no indicators of any radio tools, it’s all hidden. I even put in a headliner to cover the servo and lighting wires to the wing. I additionally scratch-built the pilot out of 3D-printed elements and a sewn-up physique.

ABOUT THE AUTHOR
Rick Hanus developed a eager curiosity in plane modelling on the early age of 11, transitioning from U-control to RC plane. His ardour for airplanes impressed him to pursue a profession in aviation, the place he held varied positions throughout the trade. He retired as an airline pilot after serving in quite a few capacities, together with teacher and fleet Chief Pilot for a significant airline.
Text & Photos By Rick Hanus