We all make dumb moves when flying. Practice is the best cure for this problem, as the ones who make the least dumb moves are usually the ones who fly the most. Since I have moved about an hour’s drive from the flying field, I no longer go flying several times a week. And this is partially what led to writing this wing repair article. I say partially because any rookie should have known to raise the gear after engine failure on takeoff. But, being as the DLE-55RA or any DLE engine has NEVER failed me on takeoff, I was a bit unprepared and the Zero came down on the mains and the rude impact drove them upward almost thru the wing. Damaging a plane isn’t a big deal to me any longer as I have been in the RC game for 31 years, but cat-calls from the peanut gallery sometimes are hard to digest! ha. So, I walked over to the wreck, picked her up and proceeded to do an autopsy so I could have something tangible to blame it on! After a not-so-long examination, I realized I had a very oil-fouled spark plug and should have changed it out several flights before the mishap. The engine had been trying to tell me it was slightly ill on previous flights and I refused to listen. An erratic idle was the clue I should have paid attention to. I run 32:1 gas/oil ratio and while it keeps the internals happy, it fouls plugs fairly well and one has to keep an eye and ear open for the warning signs.
But now to the matter at hand. While the fuselage is intact, what we have is a pretty messed up wing. Both halves of the wing have shredded sheeting, top and bottom. Many would simply throw this into the dumpster. But not me. I have 200 plus flights on this old girl and decided to rebuild her into flying condition. The Zero is one of the best, most forgiving, fastest warbirds out there, so, I must get her flying once again. This particular Zero is from China Model Products and is about 82 inches span. Glass fuselage and built-up wing and tails.
Bottom of wing took the worst beating. Note the Spring-Aire (now Robart) retract mechanisms left in place.
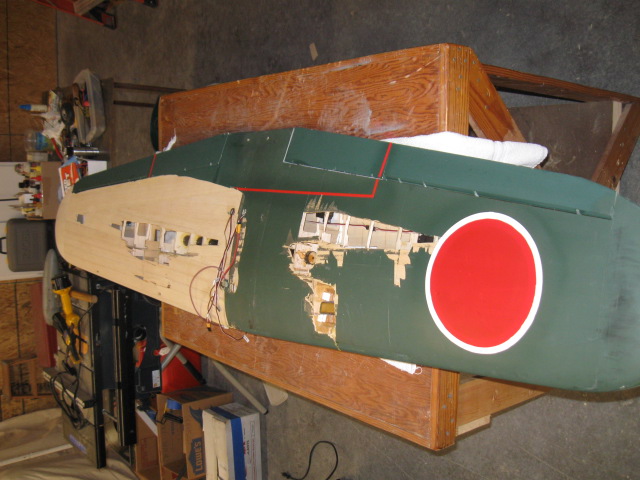

Top wing not as bad, but needs some serious TLC. I don’t really have a job guide to lead me thru a repair such as this, but I have a feel for what needs to be done. Once I removed the struts from the retract units I began looking for what parts I could put back into position and re-glue with CA and what I could strip off for the round file. The important part is to carefully put critical things back into place so as not to lose any alignments such as the fixed-gear or retract mounting blocks. The retracts usually have an angle-of-dangle that is important to keep as-designed. That’s why I left the retract units, minus the struts, on the wing. This will hold the hardwood mounting blocks into position to aid in getting them put back into place. Once you get these items solid, then proceed to slicing the broken sheeting off using neat cuts with a Number 11 X-Acto blade, saving as much as possible – the idea is to repair the wing, not totally rebuild. The damage on this wing was pretty much related to the retracts taking the hit so I was spared any repairs to the flaps, ailerons, and wingtips. Once you get the shattered sheeting removed, then you need to take a look at broken ribs. Of all the repairs, this is the most intense as you don’t have a guide to make new ribs and must jury-rig as best you can. There are usually intact ribs that can be traced along the edges such that you can get the basic curve and create a “strip or scab patch” to CA alongside the break. Sometimes you need to make a “crutch” repair to support the rib vertically. In either case, make sure you have decent structure before you try to re-sheet the surface.
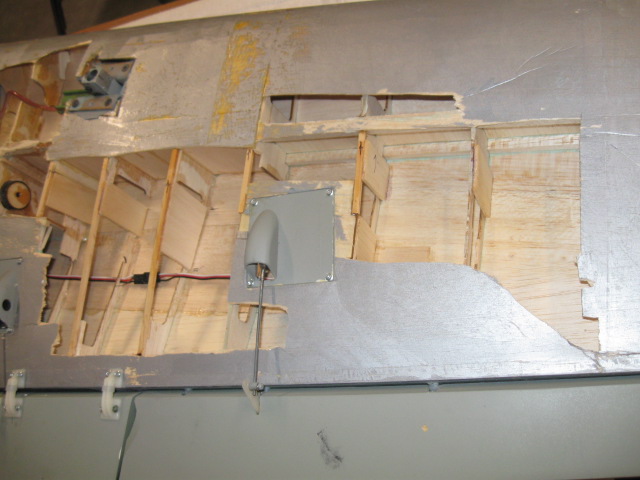

After removing the sheeting several ribs are seen to be broken. Recreate the basic rib contours with strips and add crutches.
Most of the repairs can be made with CA but there may be areas where you want to use Epoxy and in this case, Z-Poxy and glass cloth. Since the area around the retracts has been repaired before, it was getting a bit dicey to repair properly so I reinforced retract mounting blocks and surrounding ribs with glasswork. I mention Z-Poxy not to name drop, but because it is an excellent glue for glasswork. It’s got a long work time and sands easily. I like it especially for glassing over wing sheeting. Most wings use 3/32” sheeting so that’s what I have on hand. You can start on the leading edge and work back or the go the opposite direction. I like to resheet from the trailing edge and move toward the retracts as they are usually the hardest to work around. It’s kinda tedious but work as long as you feel like it and quit when you get tired. Pushing yourself to finish sometimes results in a sliced finger or some other mishap with the cutting tools. Keep the sheeting joint lines even and tight as you CA them. I take the long edge of the sheeting and glue it first, making sure I get that edge solid, then lay on the ribs and glue the short edges. You should keep some thick CA on hand to glue the ribs under the sheeting where you cannot access as it gives you time to place the sheeting down into place. Also, be sure to cover that sheeting with a weight of sorts to keep pressure on the ribs until the CA has fired-off. Continue this process until you have rewoven the sheeting on that side of the wing. Once sheeted, get your 80 grit sanding block and hit it a few strokes to even up the sheeting and clean off the CA that bleeds out. But, don’t get carried away with the sanding – 3/32” balsa is dang thin stuff! You have got to realize you are saving your favorite warbird or scale plane here, not going to Top Gun or the Toledo concours RC Show! Once you have recovered the wing, it should be presentable, but not necessarily perfect. You are looking for functional strength, mostly.
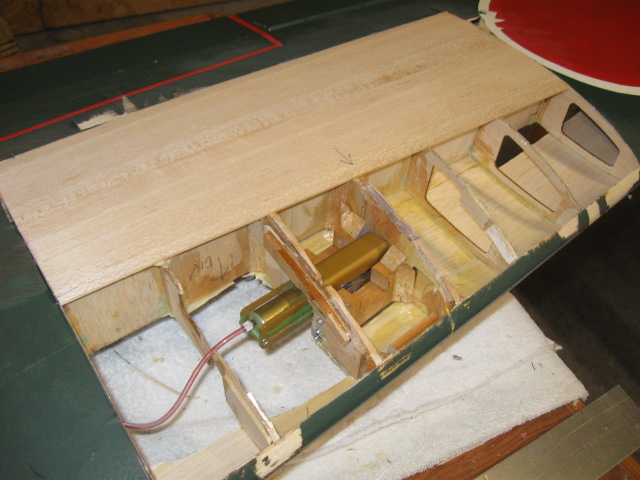

Top wing resheeting has begun. Work sheeting in as long a strip as possible.
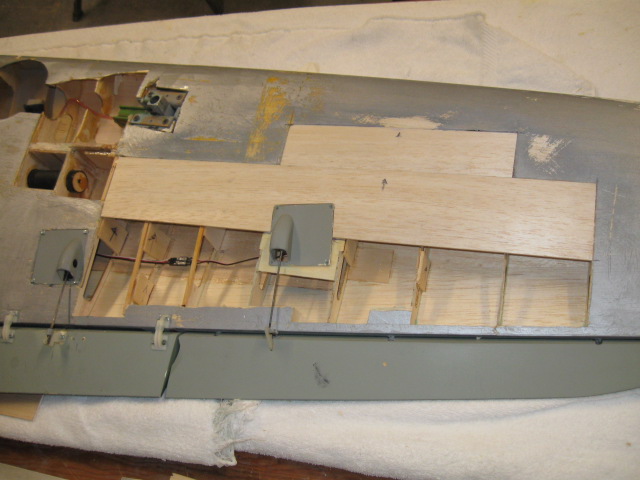

Bottom wing is more of the same. May not be the same appearance or layout as first built, but the emphasis is to attach firmly to the structure.
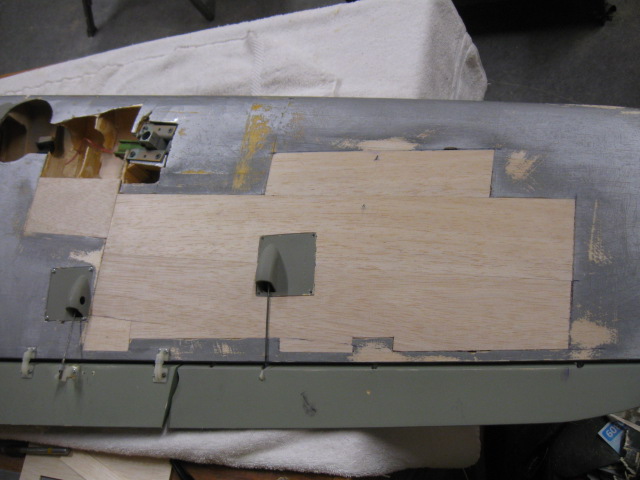

Press on until you get a solid repair. Minor gaps can be filled with Bondo.
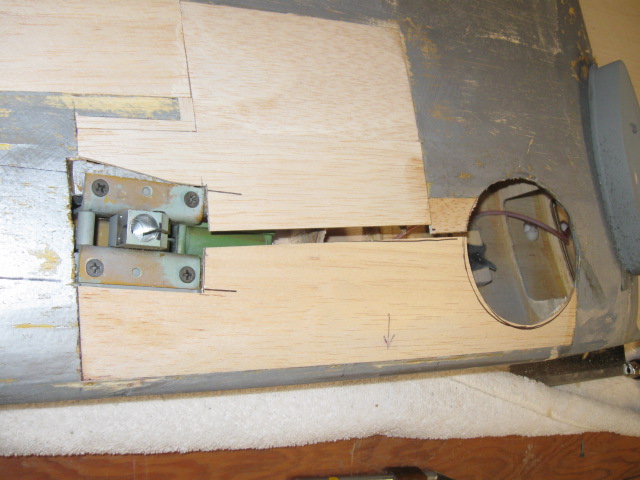

Sheeting is about done, but needs the strut in place to make final cuts.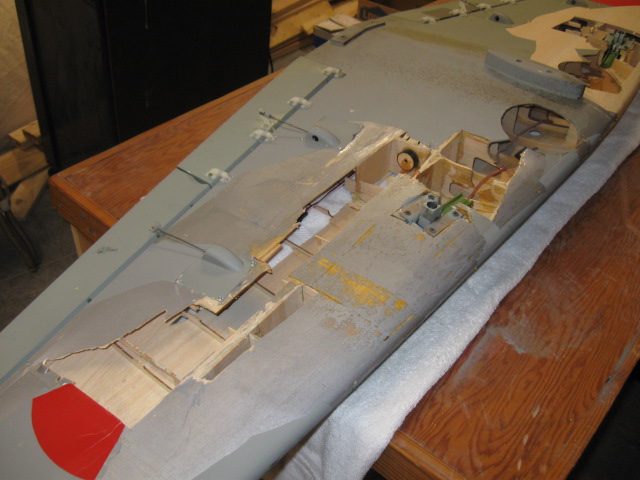


Insert the strut and keep fitting/trimming. Left wing bottom is solid now.
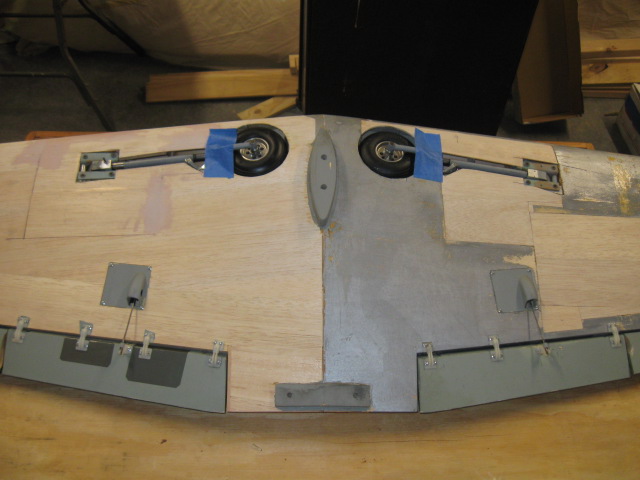

Eventually, you’ll get to this stage. Take your time.
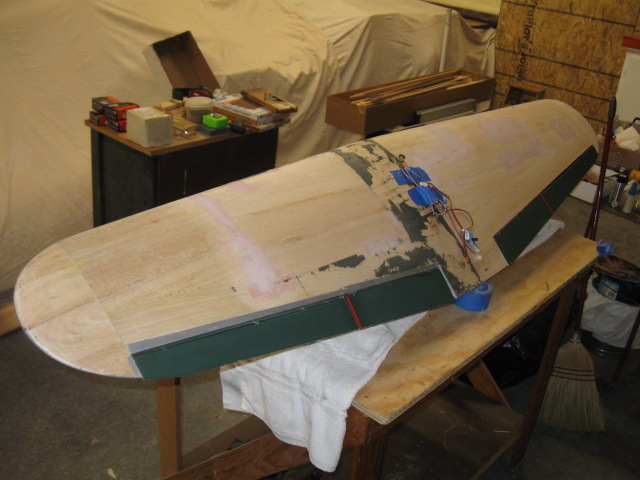

After sheeting and some Bondo in places, this is where you arrive. Ready to recover.
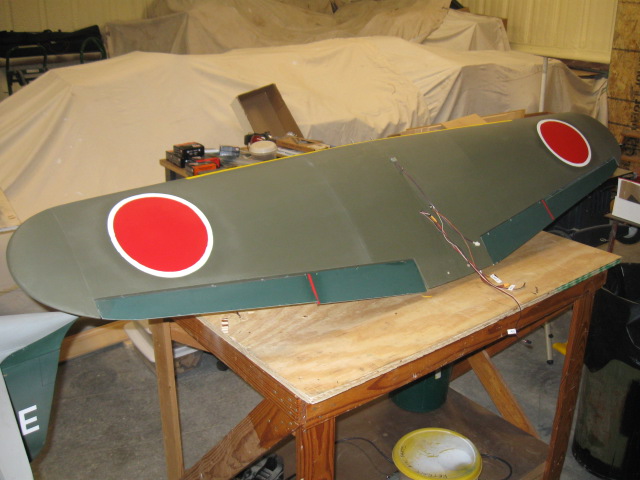

Yes, the OD Solar Tex covering is a slightly different color than the ailerons and flaps, but it’s functional and most importantly, it’s what I had on hand. I chose to just recover with Solar Tex but I could have glassed the wing for even more strength. Meatballs are home made from MonoKote.
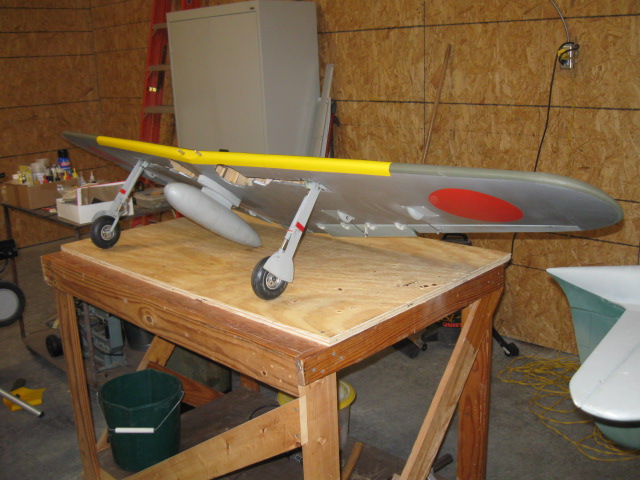

Bottom of wing. Also not discussed is that the struts needed a bit of TLC hand straightening and vise work. That’s the great thing with Robart struts – they are steel and you can rebend them a bit without metal fatiguing them like aluminum struts.
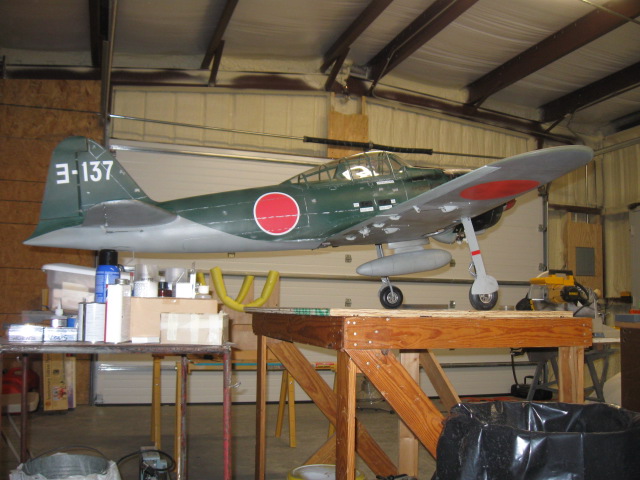

Ahh, that’s my girl! She’s a beauty and flies great. Ready to go out there once again looking for “Pappy” in his Corsair.
TEXT & PHOTOS BY LANE CRABTREE

