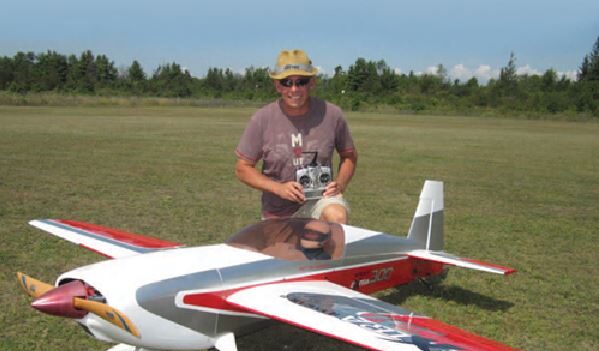
Shown with his 120cc-powered Hangar 9 Extra 300, Kevin Siemonsen is an expert aerobatic pilot with lots of experience. He learned from each mistake how to do it better. Here are some of his tips:
It wasn’t that long ago that, when I got a new plane, I’d get it airborne as fast as I could without making much of attempt to really dial it in. If my plane had unique traits or felt unbalanced, I’d just get used to how it flew and compensated with my thumbs. This really isn’t a good way to build your piloting skills as you spend lots of your time trimming and retrimming using your transmitter. When it comes to different maneuvers and airspeeds, you just can’t get the settings nailed down. I always thought, “There just has to be a better way.”
Well, there is. It is more effective to use the programming available with your computer radio and take advantage of what it has to offer. Also, how you set up your airplane and make adjustments to it greatly improves how it will perform.
RADIO GEAR
Radio installation is a much deeper subject than just plugging your servo leads in the correct receiver ports. When installing your receiver and battery pack, it is important to isolate components from vibration. We recommend using hook and loop fastener backed up with a strap.ts case. This will prevent the components from vibration along with making sure nothing comes loose in flight.
Proper control of your airplane requires that you install your control linkages correctly.
This is an area where I wouldn’t skimp when equipping a 3D plane. Go with the manufacturer’s recommendation when it comes to servo torque specs. When picking servo arm size, you first must take into consideration the thickness of the control surface and the horn to which it will be connected. The distance from the control-surface hinge centerline to the control-horn linkage attach point is what governs the length of the servo arm. Ideally, you want the control-surface travel to be linear with the servo travel. If you use a servo arm that is too long, it will provide additional control deflection but at a cost of reduced mechanical advantage and, thus, reduced holding power. The most effective length for a servo arm is one that allows your servo to rotate near its travel limits while achieving the desired control-surface deflection. Another important tip here is to add just a dab of silicone to the edge of the exposed servo-arm screw and the top of the arm, which will prevent it from coming loose.
ENGINE INSTALLATION
When installing a gasoline engine, remember to always use thread-lock. Make sure that any of the screws, nuts, and bolts that are the least bit associated with the engine are installed with thread-lock to secure the hardware, or it will—sooner or later—fall off! Engine cooling on big-scale 3D airplanes is also important, especially if you’re the type of person who likes to hover. To cool an engine effectively and provide constant airflow through the cowling, the air-inlet area versus the air-outlet area should be roughly 1:2. This means that the cooling-air exit from the cowl should be about double the size of the cooling-air inlets. Even more effective cooling can be achieved by channeling air directly onto the engine cylinders with balsa or thin plywood baffles. Air takes the path of least resistance, so whenever possible, direct it where it will have the maximum effect.
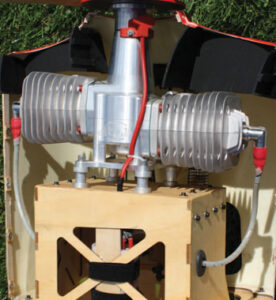
In some cases, manufacturers suggest that you cut an opening in the bottom of the engine-attachment box and surface-mount the throttle servo so that it is exposed behind the engine. This is usually not a problem, but I much prefer to install the throttle servo within the airframe to shield it from unnecessary heat. Be sure to install the servo firmly and use the included rubber grommets and the brass inserts that come with the servo to protect it from vibration. Drill a hole in the firewall where required for the pushrod location. Make sure that the linkage does not bind where it passes through the firewall and that there is no play or slop in the linkage. The throttle-servo arm should be the same length or slightly shorter than the carburetor’s throttle arm. Use a ball link on the engine end to eliminate any slop at the throttle arm. For linear throttle response, make sure that the carburetor is half open when you center the throttle stick. Think of it as having your flight controls centered when the stick is at neutral.
GAS TANKS AND BALANCE
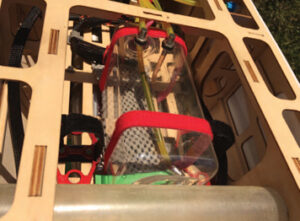
With fuel systems, it is obviously important to have a sound installation but often the fuel-tank location is overlooked. You should install the fuel tank at the aircraft center of gravity (CG), so as the fuel is consumed, it keeps the flight characteristics consistent regardless of fuel quantity. And speaking of CG, always balance your aircraft correctly. An unbalanced plane will have more unwanted control coupling and simply won’t fly as well. Electronic mixing can be used to dial out bad characteristics due to an incorrect CG, but that’s not the solution. Solve the root cause of the problem and eliminate the need for corrective mixes.
EXHAUST SYSTEMS
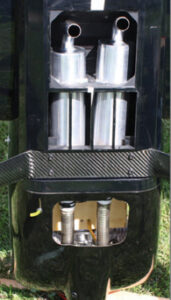
When it comes to installing your exhaust system, consider its purpose and the noise requirements where you will be flying. In general, standard mufflers are typically the loudest and provide linear power delivery. Though slightly heavier then mufflers, canister exhausts are quieter, still provide linear throttle response, and can offer modest power gains. Tuned exhaust systems are about the same weight as canisters; they are also quieter than mufflers but can be less linear with power delivery. They do, however, provide a noticeable increase in power.
While installing an exhaust system, keep in mind that it’s equally important to keep it cool. If you have to remove some covering in the exhaust area, make sure that there is sufficient clearance so that there is suitable airflow. Canister and pipe mounts are available in plywood and aluminum, and silicone couplers are used to isolate them from the engine heat. Smaller tubing is used to support the exhaust and provide some “float” within the mount to minimize chaffing.
HAVE A PLAN
Another way to maximize your flying skills is to fly with purpose. Don’t just fly around chasing the clouds. Plan your flights, and work on maneuvers that give you trouble. After all, practice makes perfect, and I always try to improve my flights. I find that using a simple stick plane to visualize your maneuvers does wonders for keeping control moves clear in your head.

BOTTOM LINE
I have learned most of what I know about building, trimming, and adjusting aerobatic airplanes from the school of hard knocks. If you understand and pay attention to the little things, you can improve your aircraft setup and enjoy significantly improved flight performance. Why not get the most out of your plane? I hope that these tips make a difference with your airplanes so that you can enjoy flying them that much more.
TEXT & PHOTOS BY KEVIN SIEMONSEN

